
Last updated November 17, 2026
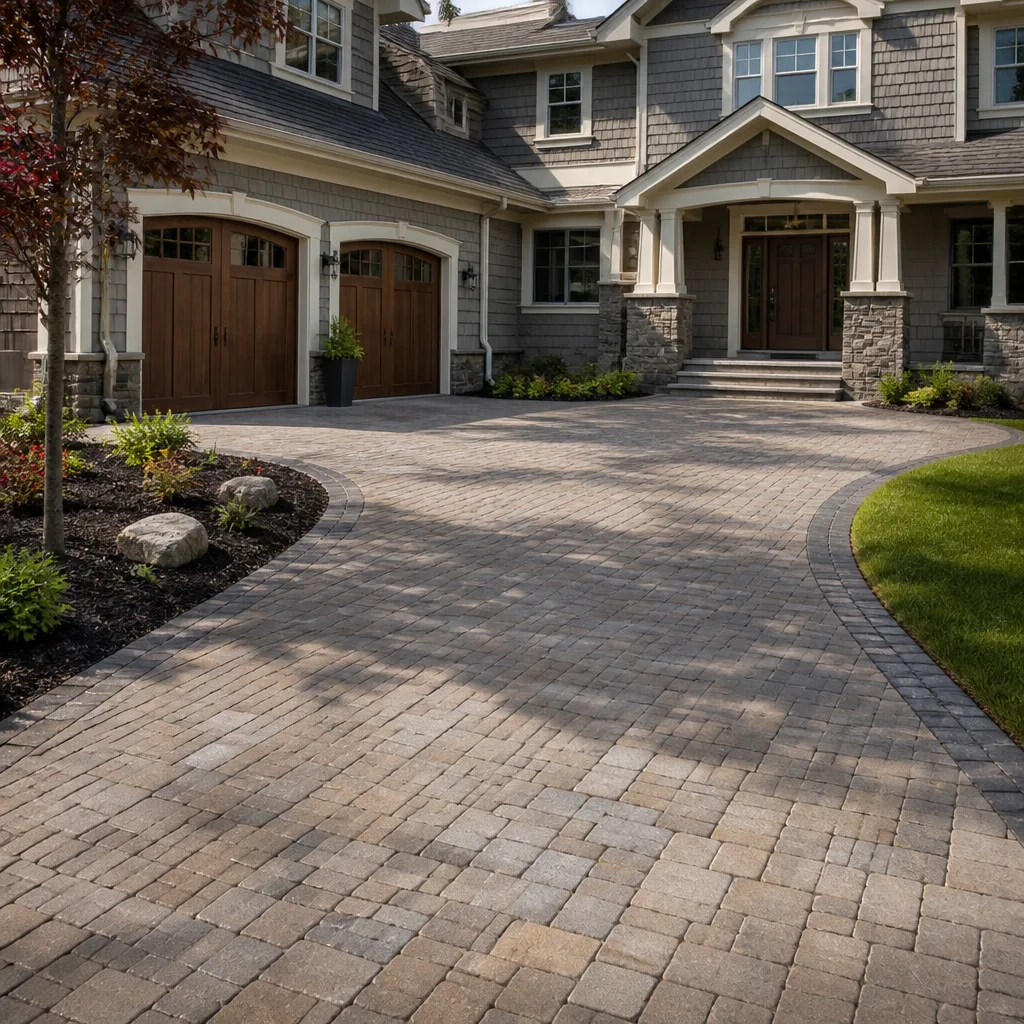 Driveway & pavers
 Kitchen remodeling
 Bathroom remodeling
 Home additions & ADU
 Roofing
 Windows & doors
 Fence
Free written scope consultation - allowances, timeline, and change-order rules on paper before a single trade is scheduled
Driveway & Pavers Troubleshooting: Common Problems and How to Fix Them
A sunken paver and a rocking paver look like the same problem. They aren’t. One means the base under your driveway compacted wrong in year one. The other means water is washing sand out from under the surface right now. Fix the wrong one and you’ll be patching the same square of driveway again within a season. After enough callbacks on Irvine driveways, we’ve learned that nearly every paver problem traces back to one of four failures: base, sand bed, paver defect, or edge restraint. This guide is a diagnostic framework. You’ll learn how to tell them apart, what each costs to fix, and when a partial repair will hold versus when it’s just money spent delaying the inevitable.
Quick Answer
Most driveway paver problems come from four root causes: a poorly compacted base, sand bed erosion, defective pavers, or failed edge restraint. Diagnose the cause before you repair a symptom, because a $200 spot fix and a $4,000 section rebuild address completely different failures. Sunken pavers usually point to base failure; rocking or shifting pavers point to sand loss or edge failure. Matching the fix to the cause is the whole game.
Styles & brands we work with
- Kitchen remodeling
- Bathroom remodeling
- Home additions & ADU
- Roofing
- Windows & doors
- Driveway & pavers
- Fence
Table of Contents
- The Root-Cause Diagnostic Tree: Four Failures, One Symptom
- Base Failure: Why Sections Sink and How to Fix Them
- Sand Bed Erosion: Fixing Rocking Pavers Without Tearing Up the Driveway
- Paver Defects: When the Block Itself Is the Problem
- Edge Restraint Failure: The Most Overlooked Cause
- Efflorescence: Cosmetic Staining or a Moisture Warning Sign?
- The Correct Re-Leveling Process for Sunken Sections
- Contractor-Caused Errors You’ll Only Notice in Year Two or Three
The Root-Cause Diagnostic Tree: Four Failures, One Symptom
Homeowners usually describe the symptom: “my driveway is uneven,” “a paver popped up,” “the corner is sinking.” The symptom tells you almost nothing. The diagnosis depends on how the paver behaves when you step on it and where the problem sits in the driveway. Here’s how to narrow it in about five minutes without any tools.
- Step on the paver and listen. A hollow thud or a rock-over-something feel means the paver is unsupported. That’s usually sand bed erosion or a base void underneath. A dead, solid feel with the paver sitting lower than its neighbors means the base itself settled.
- Look at the joint sand. Wide, washed-out joints around a cluster of pavers point to sand loss. Uniformly tight joints around a sunken area point to base movement.
- Check the edges first. If the failure is within 18 inches of the driveway perimeter or against the garage apron, suspect edge restraint before base failure. Edges fail first because that’s where water and traffic concentrate.
- Watch the water. Note where puddles form after rain. A low spot that holds water for hours is telling you the base has lost its slope, which means the water is getting in and accelerating the failure.
Two or three of these signals usually cluster together and point to a single cause. A driveway sinking near the garage door in a Turtle Rock house we looked at last spring sank because the base was never compacted in lifts – the whole front bay was failing uniformly, not just one paver. A driveway in Woodbridge with the same complaint had one rocking paver and a washed-out edge, which turned out to be a failed plastic edge restraint letting water under the surface. Same phone call, two completely different repairs.
Base Failure: Why Sections Sink and How to Fix Them
Base failure is the single most expensive and common paver problem we diagnose on Irvine driveways, and it’s almost always an installation error rather than a materials problem. The paver base is what holds everything up: a graded, compacted layer of crushed aggregate that spreads the load of cars and soil expansion. When the base is too thin, laid on soft soil, or compacted in one deep pass instead of thin lifts, it settles under traffic and shifts with seasonal moisture. The pavers above follow the base down, which is exactly what a “sunken driveway” is.
How to know it’s the base:
- The dip is broad, not a single paver. You can see a bowl or a wave in the surface across several square feet.
- The pavers feel solid but sit lower than their neighbors, with no rocking.
- The failure appeared within the first two years after installation, or after a heavy rain season.
- The low spot holds water, because the base has lost its engineered slope.
The fix depends on how wide the failure is. A section under roughly 20 square feet can sometimes be lifted, the base reworked, and the pavers reset. Anything wider, or any base that has lost compaction across a large area, needs the section removed, the subgrade re-graded, fresh aggregate brought in and compacted in lifts, and the pavers re-laid. That’s a real repair, not a spot fix, and it’s the only one that holds. Irvine’s clay-heavy soils in areas like Northwood and Westpark expand and contract with our wet winters and dry summers, so a base that wasn’t built for that movement fails faster here than it would in a sandier market.
This is the repair where cheaping out costs you twice. A partial base fix that doesn’t address the whole failing footprint will just shift the problem to the adjacent pavers within a season or two. When we take on paver work through our Driveway & Pavers in Irvine service, base prep is the part we refuse to shortcut, because it’s the part nobody sees and the part that determines whether the driveway stays flat.
Sand Bed Erosion: Fixing Rocking Pavers Without Tearing Up the Driveway
Sand bed erosion is the second most common cause of paver complaints, and it’s the one homeowners are most tempted to “fix” by just adding sand on top. That doesn’t work. The joint sand you see is not the same as the bedding sand under the pavers. When the bedding layer washes out or compacts away, the pavers above lose support and rock. Rocking is a small problem with a small repair window – let it run for a spring and you’ll have cracked pavers and a failing edge.
Here’s how erosion presents differently from base failure:
- It’s localized. One or two pavers, not a bowl.
- The paver rocks underfoot. You can feel the wobble.
- Joint sand is missing or loose in a strip, often along the drainage path.
- It appears near edges or low points where water flows first.
The correct repair, in order:
- Note the exact pavers involved and mark them with chalk.
- Lift only the affected pavers using two flat pry bars or paver extractors, one on each side. Do not pry one side at a time; that cracks the paver.
- Inspect the bedding sand. If it’s washed out, bring in fresh concrete sand and re-screed the bed to match the surrounding slope.
- Reset the pavers, check them against a straightedge spanning the surrounding stable pavers, and tap them level while they’re still removable.
- Once the surface is flat and unsupported voids are gone, sweep dry polymeric joint sand into the joints and wet it in per the product instructions.
The key rule is to keep the repair footprint tight. Lifting more pavers than you need disturbs the surrounding stable bed and turns a 45-minute fix into a full-section reset. On Irvine driveways, the erosion spots cluster near the gutter transition and along the expansion joints against the garage slab, where water running off the roof concentrates. If you’re seeing rockers in a line along the driveway’s low edge, the edge restraint – next section – is worth checking before we touch the pavers at all.
Paver Defects: When the Block Itself Is the Problem
Genuine paver defects are rarer than failing bases or washing sand, but they do happen, and misdiagnosing a defect as an installation error wastes the same money in the opposite direction. The four defect categories we see on Irvine driveways are efflorescence (covered in its own section below), spalling, freeze-thaw damage, and dimensional inconsistency from a cheap or mismatched production run.
How to identify a real paver defect
- Spalling: the top surface flakes or pops off in small chips, often from a single visible spot. Spalling from a manufacturing flaw appears across multiple pavers from the same pallet at roughly the same age, not randomly across the driveway.
- Freeze-thaw damage: cracks radiating from the paver’s edges or corners. In Irvine this is less common than in mountain markets, but a short cold snap after a wet winter can crack pavers that weren’t fully sealed and that sat in pooled water.
- Dimensional mismatch: the joints between pavers wander wildly instead of staying parallel. That’s a production tolerance issue, not a settling problem.
- Color mismatch: a patch of pavers visibly different in tone from the rest. That’s usually a dye-lot issue from a second shipment, not a defect in the paver, but it’s the sort of thing that should have been sorted before install.
One or two cracked pavers after ten years of normal traffic is not a defect. Twenty pavers spalling from one pallet is. The distinction matters because a defect claim goes to the paver manufacturer, not the installer, and the fix is paver replacement rather than base work. If the same failure pattern repeats across a wide area from one production batch, that’s the concrete signal – and it’s worth calling the installer early rather than patching cracked pavers one at a time. When the pavers themselves come from a brand with a real track record, like Belgard, you’re dealing with a manufacturer who stands behind the product; when they come from an unmarked pallet at the bottom of a wholesale lot, you’re on your own.
Edge Restraint Failure: The Most Overlooked Cause
Edge restraint is the strip – usually plastic, sometimes aluminum or steel – that locks the perimeter of a paver driveway in place. Without it, the outer row of pavers has nothing pushing back against the load of a car and the pressure of the surrounding soil, and it eventually spreads. Almost every paver repair we’ve done on a driveway older than four years has started here, because the edge restraint is buried, invisible from the surface, and forgotten until the outer pavers start to walk outward.
Signs of edge restraint failure:
- The driveway’s outer row of pavers fans outward, with joints widening toward the perimeter.
- Pavers along a curb, walkway, or lawn edge rock more than the rest of the driveway.
- The line of pavers against the garage apron has pulled away, opening a gap.
- You can dig a couple of inches under the outer row and find the edge restraint is cracked, tilted, or missing.
The repair is straightforward but requires the perimeter row to come up. Old failed edge restraint gets removed, a new restraint gets spiked into a compacted base with the correct slope, and the perimeter row goes back down tight against it. Then the joints get re-sanded. On Irvine driveways, edges next to irrigated lawn are the ones we see fail first, because the irrigation runs water against the driveway edge year-round and softens the soil under the restraint. If your driveway borders a wooded area or a slope at the property line – a common layout in Shady Canyon and Quail Hill lots – check the edge on the downhill side before you assume the rockers are a sand problem.
Fail to fix a bad edge and you’ll watch the problem travel inward, one row of pavers per season. A loose perimeter is a driveway-wide problem disguised as a row of small ones.
Efflorescence: Cosmetic Staining or a Moisture Warning Sign?
Efflorescence is the white, chalky bloom that shows up on paver surfaces, and homeowners usually want to know whether it’s a stain they can clean or a sign of something bigger. The answer is: sometimes one, sometimes the other. Efflorescence is a mineral salt deposit left behind when water moves through the paver and evaporates at the surface. Fresh, uniform, powdery bloom on a newer driveway in a dry season and disappearing after a wash is cosmetic. White streaks along a crack, along the joint line of one area, or recurring in the same spot after every rain is a moisture-intrusion warning sign.
How to tell the difference:
- Cosmetic: an even bloom, easy to brush off, not tied to any specific crack or low spot, and it fades within a few weeks of dry weather.
- Warning sign: efflorescence concentrates around cracks, joints, or edges; it returns in the same spot after every rain; or it’s paired with a low spot in the surface. That means water is getting into the paver or the base and evaporating off, and the salt is just telling you where.
For cosmetic efflorescence, a mild efflorescence cleaner (look for efflorescence remover from a paver manufacturer’s line) and a stiff brush will clear it. For the warning-sign version, cleaning the surface without addressing the moisture only buys you time. Check the diagnosis tree at the top of this guide: if the same spot blooms every rain and there’s a slight dip or a crack nearby, you’re looking at base or edge failure hiding under a stain. In our experience on Irvine driveways, efflorescence in the front driveway near the garage door is usually the first visible sign of water pooling against the slab and running under the pavers. Treat the white bloom as a diagnostic clue, not a finishing problem.
The Correct Re-Leveling Process for Sunken Sections
Re-leveling sounds like it just means “lift the sunken pavers and put them back.” Do it that way and you’ll disturb the surrounding stable pavers, lose the engineered slope, and end up with a surface that’s level in the wrong direction. Here’s the sequence that actually works, and it’s the one we use on all our paver repairs.
- Mark the repair footprint. Chalk a boundary one paver row wider than the visibly sunken area, and check the slope with a spirit level spanning the surrounding stable pavers. You’re stepping to the surface around the repair, so the target is a straight line across the whole section.
- Lift only within the footprint. Use two flat pry bars or a paver extractor, lifting pavers on the short dimension, and stack them in the same order so they go back in matching position. This preserves the color and joint lines.
- Diagnose the base under the lifted pavers. Is the subgrade soft and spongy, or has the sand bed washed out? Soft, moist subgrade is base failure; dry, missing bedding sand is erosion. This is the moment to decide if the repair is a full-section reset or a re-screed.
- Re-grade and re-compact. Rake the base to the target slope, bring in fresh class II aggregate if the base is under-thickness, and compact with a plate compactor in short passes. Compaction is the step most DIY re-levels skip, and it’s the reason the same pavers sink again next winter.
- Re-screed the bedding sand. Fresh concrete sand to a 1-inch loose bed, screeded flat against the level and slope checks.
- Reset the pavers and check the whole line. Reset pavers row by row with a rubber mallet, checking across the section with a straightedge. Any paver that rocks or sits proud goes back up; don’t tap a rocker into place over a void.
- Re-sand the joints. Dry polymeric joint sand swept in and wet per product instructions. For a full-section repair, re-install the edge restraint and its spikes as part of the same job.
One honest note about partial repairs: if the sunken area under re-leveling is small and the surrounding pavers are solid, the repair is structurally sound and will hold. If the base under the surrounding section is soft – meaning you can fold it with a spade – a re-leveling is only delaying a full re-do. Diagnose the base condition before you re-level, not after.
Contractor-Caused Errors You’ll Only Notice in Year Two or Three
Most of what this guide has covered – base failure, sand erosion, edge failure – starts life as a contractor error that doesn’t show up on day one. If you bought a house in Irvine built or paved in the past five to eight years, the odds are good you’re living with someone else’s installation. Here’s what those errors look like two to three years later, and how to document them for a warranty claim before the window closes.
What contractor-caused errors look like on the surface
- Base too thin or uncompacted: broad, uniform sinking within the first two years. Either the base was under-specified in thickness or compacted in one pass instead of thin lifts.
- No edge restraint on one or more sides: the outer row fans outward within a season or two. This is the single most common installation shortcut we see on new driveways.
- Wrong bedding sand: fine sand that washes out, or sand bed laid too thick (over about 1.5 inches loose), causing pavers to rut under the first traffic.
- No expansion joints against the garage slab or walkway: cracks in the pavers along the joint line by year two, because there was nowhere for the driveway’s seasonal movement to go.
- Paver laid over an old concrete slab without proper drainage: efflorescence, water sheeting under the pavers, and water pooling against the house or garage by year three.
How to document a warranty claim
- Date the failure. Take a photo with a time and date stamp the first week you notice the sunken section, the rocking paver, or the fanning edge. Warranty claims hinge on when the failure started, not when you finally called.
- Photograph the whole footprint. Wide shots of the whole driveway and close shots of the failure. Documentation with the property address and a wide framing the failure in context is far stronger than close-ups alone.
- Pull the original contract and warranty. Check the scope, the base specification, and the warranty terms. If the contract says “4-inch compacted base” and the base is 2 inches, you have a documented spec violation.
- Keep a log of symptoms. When it was first noticed, when it got worse, when water started pooling. A short written log with dates carries more weight than a memory.
- Get a second opinion in writing. A written diagnostic from a contractor who didn’t do the original install, describing the cause and the recommended repair, is what turns a warranty argument into a paid repair.
The window matters. Base and edge failures often don’t appear until year two or three, which is exactly when a one-year installer warranty has expired. Our 730-Day Done Right Promise exists for exactly this reason: if a driveway we build fails because of how we built it, we come back and make it right for two full years. As your Groundwork Construction Co. of Irvine home page puts it, we build from foundation to finish line – which means the part under the pavers counts, not just the part you can see.
Common Mistakes to Avoid
- Patching a sunken paver without lifting the one next to it to check the base. Sunken pavers almost always sit over a soft subgrade, not just a missing sand bed. Fix the surface without checking the base and the same section sinks again within a season.
- Treating a rocking paver with a hammer. Tapping a rocker with a rubber mallet seats it over the void instead of under it, then the paver pops free at the first heavy car. Lift the paver, re-screed the bed, set it back down.
- Adding joint sand over a failed edge restraint. Sweeping dry sand into widening perimeter joints feels productive, but it just fills the gap the failed edge has opened. Fix the edge restraint first, then re-sand.
- Skipping compaction on a re-screed. A plate compactor in the rental aisle of a home center is $60 for a half day; using it is the difference between a re-level that lasts three years and one that lasts three months.
- Ignoring efflorescence that returns in the same spot. White bloom that comes back after every rain along the same joint line or crack is the surface message of a moisture problem. Clean it and forget it, and the crack underneath gets bigger.
- Not documenting failures while the install warranty is still open. A base failure at year two is often still a contractor matter; at year four, it’s a repair you pay for. Photograph and log it the week you notice it, and get the diagnosis in writing.
- Never checking the perimeter edge on a driveway next to irrigated lawn. In Irvine, edges along irrigated lawns fail first because water runs against the restraint year-round. Walk the perimeter once a year and look for fanning pavers before the interior rockers start.
See the difference
 Before
 After
 Before
 After
 Before
 After
When to Call a Professional
The line between a homeowner fix and a professional repair is the base. If the problem is one or two rocking pavers with obvious missing joint sand and no sunken footprint, a careful homeowner with a rubber mallet and a bag of polymeric sand can usually handle it. If the driveway has a visible dip across several square feet, if the outer edge is fanning outward, if water is pooling against the garage or house, or if the failure is concentrated on the edge next to an irrigated lawn, call us. These are the failures where a partial fix costs money twice.
We’ve seen Irvine homeowners spend a weekend on a DIY edge repair, only to call us a month later because the fanning spread inward. Base and edge work requires the perimeter lifted, the subgrade regraded, and the whole section compacted and reset – which is a morning’s work with the right equipment and a frustrating, cracking Sunday without it. Groundwork Construction Co. of Irvine offers free estimates in Irvine, with upfront pricing and no surprises. Call (888) 578-4462 to schedule yours; our lines are answered by a live person, 24/7, and every technician is background-checked and arrives in uniform.
Frequently Asked Questions
Sinking pavers almost always mean base failure, not a paver defect. The crushed aggregate under the pavers has either compacted further under traffic, lost compaction because it was never properly built, or softened where water is getting in. Broad, uniform dips within the first two years point to base. A single lowering paver with visible missing joint sand is more likely a bedding sand problem. Either way, lift the pavers and inspect the base condition before deciding on the repair – repairing a sunken paver without diagnosing the base means the same section sinks again. Call (888) 578-4462 for a free diagnostic estimate in Irvine.
Yes, if it’s a single paver with visible missing joint sand and the surrounding pavers are stable. Lift the paver with two flat pry bars, re-screed fresh concrete sand to match the surrounding slope, reset, and re-sand the joints with polymeric sand. If the paver rocks again within a few weeks, or two or more adjacent pavers are also loose, the cause is more likely a block of eroded bedding or a failing edge restraint, and that’s a professional repair. Call (888) 578-4462 for an exact quote – estimates are free.
Efflorescence is a mineral salt bloom left behind when moisture moves through the paver and evaporates at the surface. Even, powdery bloom that fades after a wash is cosmetic. White staining that concentrates along cracks or joints, or returns in the same spot after every rain, is a moisture-intrusion warning sign pointing to a base, edge, or drainage problem. Clean the cosmetic case with an efflorescence remover and stiff brush; diagnose the recurring case as a water problem. Call (888) 578-4462 if it keeps coming back in the same spot – estimates are free.
In the Irvine market, re-leveling a small rocking section usually runs $200 to $450. Replacing a perimeter edge restraint and re-sanding the joints runs roughly $400 to $900, depending on the perimeter footage. A full-section base repair on a failing area typically runs $1,500 to $4,500 depending on footprint and access. Full re-lays run considerably higher, which is why diagnosing the actual cause before you agree to any repair matters. Call (888) 578-4462 for an exact quote – our pricing is upfront with no surprises, and the number we quote is the number you pay.
The base condition decides it. If the subgrade under the sunken section is still firm when you dig a couple inches down, a partial repair is structurally sound and will hold. If the subgrade is soft, spongy, or wet across a wide area, a partial repair just delays the full-section replacement. The other test is the edge: if the outer perimeter is fanning outward on two or more sides, the whole installation’s edge restraint is suspect, and a wider repair is the only honest answer. Call (888) 578-4462 and we’ll diagnose the base condition in person – estimates are free.
Most paver repairs don’t need a permit, but anything affecting the driveway apron at the property line or the connection to a public street affects the right-of-way, which the city controls. Full replacement can also trigger grading review if the driveway slope or drainage changes. We pull the permits when a job needs them and walk you through what your repair requires – it’s one of the ways we keep the work covered by our 730-Day Done Right Promise. Call (888) 578-4462 for a free estimate and a straight answer on permits.
The Bottom Line
Most driveway paver problems aren’t bad luck. They’re the predictable output of one of four failures, and the diagnostic tree in this guide tells you which. Sunken sections point to base failure; rocking pavers point to bedding sand erosion; fanning edges point to failed edge restraint; and repeated white bloom in the same spot points to hidden moisture. Fix the cause, and a $200 repair holds. Fix the symptom, and you’re back to the same square of driveway next season. Efflorescence, spalling, and cracked pavers have their own tell, and so does an error that starts with the contractor in year one. Irvine driveways sit on clay soil that expands and contracts with every wet winter and dry summer, which makes base and edge problems show up here faster than in sandier markets. If you’re looking at a driveway that doesn’t look right, call (888) 578-4462 for a free estimate. We’ll diagnose it honestly and tell you whether you need a spot repair or a full-section rebuild.
Written by the team at Groundwork Construction Co. of Irvine.
Looking for related work around the property? Our fence installation in Irvine crews use the same edge-and-base discipline, and if you’re planning a bigger project, our home additions and ADU services in Irvine apply the same 730-Day Done Right Promise from foundation to finish line. Our technicians have up to 12 years of experience on driveway and paver work, and every project starts with a free estimate and design consult. Call (888) 578-4462 for your free estimate today.